Showing posts with label Awesome Aunty 2016. Show all posts

Wednesday, June 29, 2022

A Card by Request

#8 asked me to make her a card with a bunny. Sounds simple enough, right? 
Here's what I made. This card came together quite quickly too. 

Some simple ink blending with a grassy stencil, then some light blue ink blending set the scene. I die cut some white clouds to add some dimension to this card. I love the picket fence border die too. My neice (#8) loves Peter Rabbit.  I'm a bit of a fan myself. Of course this meant that the bunny had to be brown like Peter. I coloured the rabbit using alcohol markers and fussy cut it so I could stick it onto the ink blended background. 

#8 lives far away from us, so this "miss you" sentiment from Lawn Fawn's chit chat stamp (with co-ordinating dies) seemed fitting. 

Let me know in the comments, what are your favourite critter cards to make? 

Stay tuned for my critter card series starting next week! 


Friday, January 7, 2022

2021 Cards- Part 3

 The rest of my favourite cards for 2021 are here. Let's do this. 


Unfortunately, I had cause to send a number of Sympathy cards and other encouragement cards for people who were really struggling with illness or difficult situations.  I often feel quite helpless in these situations, but I hope that my words of support written in a handmade card will be of some comfort. 

These two cards were made entirely with Catherine Pooler products. 
I invested in two sets of the Mini Inks in spa colours.  These are just the right tone for sympathy cards. 

So simple- white card stock in a floral embossing folder makes a beautiful and subtle background. 
The silver and black mats, with the white heat embossing on black, are simple additions to these simple and elegant designs. 

Earlier this year, my niece had a tonsillectomy.  I went to Rockhampton to take care of her and take the load off her mother. I made this card for her, using a packet of water-based felt markers and a red rubber leaf stamp.  The sentiment and stripe stamps are from a stamp set by Catherine Pooler.  I think it might be retired. 

I made this card using an ink smooshed background.  
The image and sentiment are from a small Gina K stamp set that I bought on sale! 
It's the cutest whale ever! 


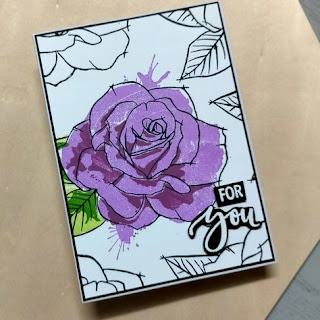
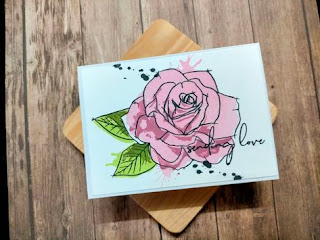
I have coveted this painted rose stamp set (by Concord and 9th) for four years!
I finally found it for a reasonable price in Australia- best birthday present ever!
The versatility of this stamp set is great. 
I can use just the outline, or one shadow layer or all the layers.  


Such a simple card that is suitable for anyone and any occasion.

More simplicity and these cards use bird shadow images from the Birds of a Feather stamp set by Catherine Pooler (in my previous card making post).
Yet another card from this awesome stamp set. 

Patterned paper tearing surrounds this big encouragement quote.
This card was so much fun to make and the design tells a story. 
I love this card.
When I showed it to my Mum (I thought she probably wouldn't like it)
she said it was very clever and she wanted to give it to a work colleague. 
I feel like I need to make more cards just like this one. 

 2022 here we come.  


Friday, June 28, 2019

Aunties' Day is Coming!!!!

It's so exciting!

It's one day a year when career women with no kids will be honoured for the massive impact they have on the lives of their nieces, nephews and other young people they know.  Save the Date People...

Sunday 28th July 2019 is Aunties' Day!!

You better get organised too. Your Aunties and Uncles must be loved beyond measure on 28 July and that takes some doing.

Here's a list of reasons your Aunty deserves a day! 

Here's a list of gift ideas and ways to celebrate! 


Need some more ideas?  Check these out...

1. Skype and FaceTime with your Auntie (and/or Uncle) to say I love you!
2. Write Auntie a letter telling her why she is awesome!
3. Organise for Auntie to have dinner with her friends.
4. Know your audience... if Auntie doesn't cope well with surprises, then don't surprise her!
5. Give her your undivided attention!  That's what she gives you.  Give some of it back!!

Love your Aunties!
They Love You!


Friday, May 24, 2019

Card Making Fun

It's been a little while since I shared any card making projects here.  I have continued to make lots of cards and experiment with techniques.  I have added a few things to my stash too.  However, I am still catching up on the sharing side of things.  I try to group my projects by technique or type of card.  Some of the cards I have been making are very similar to older cards I have made, so I feel like it would be boring to show you again.  Here are a few cards I have made over the past few months.  No fancy techniques or special products to talk about, just a couple of bits and pieces.  

Cards from the Road


You may have seen my recent post about the supplies I took with me on a short road trip.  Most of these cards were created by my nieces with the limited supplies I had with me.  There are a few other cards but I didn't get a chance to photograph them.  Oops.  


I made the card on the right and when miss 7 year old saw it,
she wanted to make one like it. I showed her what I had used.  
She didn't like the sentiments I had, so we didn't put one on.  


KISS cards


I love the idea of simple cards that I can mass produce... or at least make a set of them at once.  Catherine Pooler calls these KISS cards (Keep It Simple Stamper).  Here are a couple of sets I have created this year. 
I got a new stamp set that has some lovely sentiments in it.  
I had to make these encouragement cards.

I only made one of these cards, but as you can see, 
it's so simple that it would be easy to reproduce and make a set of them.  
I made a bunch of cards exactly like this one. 
I don't know why I didn't take photo of all of them.  


Coming Soon: colouring stamped images, using stencils, easy watercolour backgrounds, rainbow cards and more.

Until Next Week: Enjoy Creating! 


Friday, May 17, 2019

Frozen Party for a 5 Year Old

Long time AGT readers will know that I planned and hosted an epic FROZEN birthday party for my niece when she turned 10 (click here to see the details).  She is now 13 years old and her youngest sister is turning 5 this month.  Miss (almost) 5 said that she wanted a Frozen Party too.  Luckily, my mum and I don't like to throw things out, so we had lots of decorations and even prizes ready to use.  This made life so much easier.

As you can imagine, a birthday party for a 5 year old is quite different to a birthday party for a 10 year old.  We used the same snow flakes and streamers that were left over from the first party.  The main difference was that my 5 year old niece was more interested in games and fun so we kept it far more low key.

The photo booth had less pieces in it and only a few dress up props.  This was plenty.  We played a "Who am I?"  Pass the Parcel.  Each layer of the parcel had a picture of a character from Frozen, or photos of family members.  When the music stopped, the person holding the parcel was allowed to open one layer of wrapping paper, then to keep the trinket/ lolly, they had to tell everyone who was in the picture.  We played music from the movie for this game.
We got some much better photos, but due to privacy, 
I prefer not to show them on this blog.  


I made some glittery white playdoh (click for the original recipe) for the next game titled - "Do you want to build a snowman?"  Everyone got a ball of playdoh to make their own snowman. I played the song from the movie while we built our snowmen.  This was a big hit. After the organised games, this was the winner during the free choice activities.

Nearly every family party we have includes a "Pin the whatever on the whoever".  Of course, this party was no exception. We played "Pin the Nose on Olaf", which I bought for about $5 a few years ago.  We have played this game a few times and it's still good.  So worth the $5.

I also printed out some colouring pictures and mazes for the kids to do during free choice time. The Sensible Mom also had some great printable activities and there are more colouring pages available.

Food included: sandwiches, troll balls (meatballs), a cupcake tower (which was also the birthday cake), Sven snacks (carrot sticks) and some chips.  I planned for a water station with a carrot in the bottom, but the teenage brothers and sisters wanted soft drink, so my water station didn't happen. You can see below, that the table was decorated with doilies and snowflakes (cut from doilies and laminated).  We used $2 blue plastic tablecloths on the table and we hung white plastic tablecloths over the vertical blinds to make a snowy backdrop for the photo booth.
Home made cupcakes, decorated by Grandma!  The best. 

We decorated the table using ideas on my Pinterest Board.  

We played a quick game of "Musical Statues" where the children danced while the music played and when the music stopped they had to Freeze (pretending Elsa had frozen them).  I also had 'musical chairs' up my sleeve as an extra game in case they needed more organised play time.  After eating, I gave the children some free time to play with playdoh or colour in and there were a few of their favourite toys to play with as well. This gave us time to take the children one or two at a time into the photo booth and take a photo of them.  That was fun.  The adults enjoyed this as well.

All in all, it was great fun.  Miss (almost 5), had a wonderful time and that's what it's all about.

Check out all the fun and ideas from other parties I have pulled off for my nieces and nephews by clicking here. Check out my Frozen Pinterest Board here.

Party Hard, Sleep Hard!


Friday, May 3, 2019

What Craft Supplies Do You Take On Vacation?

As I mentioned a few weeks ago, I recently went on a five day road trip holiday with my Mum.  Read about how I survived the long haul drives here.  All this raised an interesting question.  It was interesting to me anyway.  If your craft (whether it's stamping, scrapbooking, drawing, painting, knitting etc) is also your therapy, do you take craft supplies with you when you go on vacation? If you do take craft, what do you take?  How much do you take? 

I know some ladies who will pack up several stamp sets, all their dies, a die cutting machine, all their inks and more.  I think that's a bit excessive.  Also, I was not travelling all that way to sit in a cabin and craft.  I can craft at home.  I was going to see the family.  I knew that my crafty time would be limited.  However, my nieces love to craft with me, so I figured that I would probably have some little helpers with me too.  This helped me narrow down what I took with me.  Do you want to know what made the cut? 

Firstly, we were attending a few birthday parties, so that determined some of my supplies because I knew my nieces and nephews would like to make birthday cards.  I also gave myself a limit - only what fitted in my craft caddy - and I didn't have a long time to pack.  This really helped.  I didn't have time to think about all the fun things I could do, I was more focused.  Here it is. 


This is an OLD photo of the 
craft caddy I took with me. 

Craft Supplies I packed for a 5 day Road Trip/ Vacation

A few basics:

  • card bases and envelopes
  • scissors and glue
  • lead pencil and eraser
  • a set of fine tip pens 
  • visual art diary (for planning/ drawing)

The rest:

  • a bunch of pre-cut "Happy Birthday" die cuts in several colours
  • about 20 tiny rolls of washi tape (an assortment from a Kmart multi pack)
  • zip lock baggies with an assortment of die-cut shapes 
  • some pre-stamped sentiments
  • a few pre-cut sentiment strips 
  • small shape punches (a heart, a few flowers, a circle, a butterfly)
  • some ink smoosh backgrounds and patterned paper from my stash
  • foil transfer accents (purchased at a local bargain centre)
  • a small Xyron sticker maker 

What I wish I had packed:

  • some watercolour markers
  • a basic sentiment stamp set (I have a few that I could have chosen to take with me)
  • a black ink pad 
  • an acrylic block or stamping tool
  • a bone folder
You might notice I took a lot of bits and pieces that I had already cut and stamped.  Most of these were left overs from previous projects that I didn't get to use.  I didn't take a lot of time getting these organised and I wasn't worried if my little helpers went crazy with anything or everything.  

This is the kind of sticker maker I have.
It was a gift from the BFF.  Thanks, Bestie! 
The girls loved using the foil transfers (which didn't require a laminator or special glue).  They also had lots of fun with the sticker maker.  It was cool to make their punched out shapes into stickers.  

What would you take if you had limited space and time? Let me know in the comments. 


See you next week! 


Friday, November 30, 2018

Gift Guide Round Up

Ever since the beginning of AGT, I have enjoyed bossing you all around when it comes to gift giving.  That is, I love giving gifts to others and I think I'm good at it.  In fact, most of the time, I'm great at it.  No apologies for truth telling.  It's almost the end of NOVEMBER!! (can you believe it?) If you haven't started thinking about Christmas, you might want to get yourself sorted.
Today, I'm sharing with you a bunch of posts from the last 8 years.. yep... 8 YEARS.. all about gifts and giving them.

Gifts for 0-5 year old kids

Gifts for 6-12 year old kids

Gifts for Mum

Gifts for the Cat!  (Shelly insisted)

Gifts for Everyone.... check out this one too.

Gifts for NO ONE! 

Gifts for Teachers


I'm really looking forward to December, when I have some fun stuff planned for all of us.    You might want to tune in for some of my suggestions for not just "surviving" the holidays, but enjoying them too!

There might even be a couple of bonus posts... we'll see!


Friday, July 20, 2018

Aunties' Day 2018- Only 2 more Sleeps!!!!

This year, you have options.

#ExcitedMuch #AwesomeAunty #countdown
I am finding some conflicting information about Aunties' day this year, which I am going to take as more opportunities to honour the awesome Aunties in our lives!

Some websites are claiming Thursday 26 July 2018 is Aunties' and Uncles' Day, which will be observed in Australia and New Zealand as well as several other countries around the world.  Savvy Auntie - the website which originated Aunties' Day in USA, has saved the date as Sunday 22 July 2018.   If you want to learn more about why we celebrate Aunties' Day, check out these links:
Why Aunties Deserve a Day
Huff Post 25 Reasons Aunts Deserve a Day

Our family are celebrating Aunties' Day this Sunday - the 22 July!  I can't wait!  

Here are a few ideas for how you can celebrate with the Awesome Aunty in your life! Some of these are perfect, even if you can't manage to see her IRL on Sunday!
  • Make her a card... she loves your art work, especially if you took the time to create it yourself. 
  • Breakfast in Bed!  What a wonderful surprise she would have if some nieces and nephews appeared in her kitchen on Sunday morning.  
  • Party!! Enjoy some time together. 
  • Last year, my niece made a Pass the Parcel for the family to play together and as each person opened their layer, they had to say something awesome about me, or give me a hug or a high five, or say "I love you".  Best Game Ever! 
  • Gift card to her favourite store or restaurant. 
  • Make a collage of photos including nephews, nieces, activities you enjoy together, your Aunty/Uncle. 
  • Tell Facebook, Instagram, Twitter and all your social media channels about your Aunty/Uncle and why they are awesome.  Encourage others to comment about their own Awesome Aunties/ Uncles.  
  • Film a Video Message for your Aunty/ Uncle and send it to him/her. 
  • Video Chat or make a phone call! 
HAPPY AUNTIES' DAY!! 

Love 

Friday, May 4, 2018

Mothers' Day Gift Guide (part 2)

Hey Everyone,
It's 9 days until Mothers' Day!
Are you organised? Do you have a card and gift? Have you arranged to see your mother that day?  Want to give your mum an awesome gift this year? Stay Tuned!

If you want to make your own card, or you make cards and need some inspiration, check out Part 1 in this series.  You can also check out my Pinterest board of home made cards.  Here are some gift ideas and gift giving tips to make you the "favourite" this Mothers' Day.


A REST!

Whether it's her first Mothers' Day or her 50th Mothers' Day, this gift is perfect! There are so many ways you can give ya Mum a rest on Mothers' Day.  You could do any or all of the following:
  • Take over the kitchen for the day - cooking AND clean up.  
  • Get the washing done for the week! 
  • Make some coupons for Mum to use when she needs a break e.g.  "This coupon entitles Mum to a 30 minute nap at a time of her choosing!" (click here for downloads and here for a second option)
  • Give Mum a night out with her Mum.  Let them rest together.  
  • Take Mum out of the house and let her enjoy time with her kids. 

A Spa Day

I know we all can't afford to send Mum off to the spa for a full day of pampering.  Some of us can't even afford to get our toe nails clipped!  There are lots of options though.  It doesn't have to be the whole day.  Choose a treatment you think she will like and book her in.  If you can't manage that, give Mum a voucher for dollar value you can afford and she can book a treatment she wants.  
Is the Spa totally out of the financial question?!  You can do it at home click here for some great ideas for pampering your Mum at home! 

Experience! 

Most mums I know always put their kids first.  They often give up time, money/ a career, little luxuries and Bucket List experiences for the privilege of motherhood.  So, if you can manage to stretch the budget... (or you have siblings who can chip in), the perfect gift is an experience Mum has always wanted.  Check out Redballoon.com and Adrenaline.com for some awesome deals on experience gifts.  
Some ideas:
  • High Tea at a fancy restaurant (this one would be great fun for you to invite friends and their mothers to join you).
  • A guided tour of the closest city.
  • A night at the Theatre - see what's playing at your local performing arts centre or theatre (not the cinema).
  • A Gold Class Cinema experience
  • A ride in a limousine
  • A personalised shopping experience with a stylist and voucher to purchase clothes she loves.
You can find cheaper options... like creating a Drive-in Theatre in your driveway or preparing all the fixin's for high tea at home.  Click Here for more ideas. 

REAL Photos! 

When I say Real Photos... I don't mean digital.  Get yourself organised and print those puppies out.  If you really want to win the gift giving competition you are having with your siblings, you should get them framed or put them in an album (with labels).  Even if you don't talk about it, you are competing with your siblings for 'favourite'... yes you are.  

TIME

If you are an adult, I am about to drop some science on you here.  This might just change your life!  There is nothing your mother wants from you more than your time.  She wants your undivided attention.  Think back to when you were a kid and all you ever really wanted was some time with your Mama!  Time when you could just enjoy being together was golden.  Reading a story before bed, playing a board game, going to the movies, painting each others' nails or playing with your trucks were the best things ever.  

Now that you are all grown up, your mother remembers those moments with fondness and wishes she gave you more of them.  Don't be too busy for your Mum this Mothers Day.  You don't have to break the bank to give your Mum what she really wants this Mothers Day.  You just have to devote some time to being with her.  Give your Mum some undivided attention this Mothers' Day and you will be the favourite, for sure! 

Now, Get scheduling, Get reading or printing or creating or whatever, but Get to it! 
I hope your Mothers Day is Magical.  


Friday, April 27, 2018

Mothers' Day Cards (part 1)

Welcome to the first of a two part series celebrating Mothers' Day 2018.

Part One: Mothers' Day Cards

Part Two: Mothers' Day Gift Guide

I have four cards to show you today. I am planning to give one to my mum, and one to each of my grandmothers.  The fourth card is also for my nieces and nephews to give to my mum, so it's a Grandma card.  I am so lucky that both of my grandmothers are still alive and they are both still teaching me in their own way.  Don't forget your grandmother/s this Mothers' Day.  Even if they are no longer living, take some time to remember them and their contribution to your life.

You will notice that none of my cards have "Happy Mothers' Day" on them.  These cards are versatile. A Mothers' Day card is essentially a Thank you card.  You could even use them as "just because" cards or even a "love you" card.  The main things with Mothers' Day cards is that they are usually feminine.

Let's get into these Cards.


A Card for my Mum

I stamped the Doodle Background Stamp from Catherine Pooler Designs in black ink on white card stock. After trimming this down, I mounted it on a strip of black card stock that was 1/8th of an inch larger.  Then, I put this on a piece of red textured paper that was the same size as the front of my card.  I stamped the sentiment in Versamark ink and heat set with white embossing powder.  Then I used the emboss resist technique to colour the paper with Rockin' Red ink from Catherine Pooler.  This came out a bit pink!  I am new at the emboss resist technique so I need a bit more practise. A couple of adhesive backed pearls and that was that. Check out this video to learn more about emboss resist and see the doodle background stamp in action! 


A Card for Nanny

I used a gorgeous Plaid Flower stamp set (by Penny Black) to make this card and paired it with a sentiment from the Lovely Flowers stamp set (by Catherine Pooler).  I used Flirty Fuchsia ink (also by Catherine Pooler) to stamp the flower and Cottage Green (by Memento) to stamp the leaves.  I borrowed some green twine from a friend to finish this card off. Then I decided that it NEEDED to have some iridescent sequins too.  I love the clean and simple design of this card.  

A Card for Grandma

I used the Bloomin' Bouquet stamp set and the Lovely Flowers stamp set by Catherine Pooler to make this card.  Inks were from Memento and Catherine Pooler.  I don't remember which colours!  Sorry.  You might notice that I didn't use any twine, sequins or stickers on this card.  It's also (almost) a one layer card.   I purposely did this because my Grandma gets a bit confused these days.  If I had used twine wrapped around a card panel, she may have tried to untie it and remove it from the card and that would have made a big mess.  I also didn't want any stick on pearls or gems to fall off and possibly be mistaken for tablets that need to be swallowed.  Neither my grandmother or grandfather have great eyesight. Sometimes we need to think about these things! 

Best Grandma Card

My last card (but certainly not the least) for today is the one I will give my nieces and nephews to give to my mum.  My mum loves red and black and white.  So, this card has the same colour palette as my first card.  I wanted it to be light and fun.  Using Rockin' Red ink (Catherine Pooler) and  a polka dot stamp (Love is in the Air SOA), I made some red with white polka dot patterned paper.  Then I went a bit crazy with my Cuttle Bug and die cut a bunch of flowers in different sizes using Eva's Favourite Flowers (by Winnie and Walter).  I used my polka dot paper, black and white card.  Then I layered them and played around with the arrangement until I landed on the one you see here.  
Stamping the sentiment took a little while, as I used the Simply the Best stamp set (Catherine Pooler) and an alpha stamp set for the word "Grandma" which I needed to stamp one letter at a time.  I stamped on white card and then glued them onto black card and cut them out with scissors.  I didn't worry about making it perfect as I wanted it to look like the kids may have made it.  Before adhering the panel to the card base, I added some black glitter washi tape to each long side of the card front so it has a frame.  A few black gems in the centre of the flowers and I was done! 


If you want to purchase any of the products you see here, check out: 

Next Week:  I will give you a few tips with plenty of time to get you organised for Mothers' Day!

Love

Friday, December 15, 2017

Gift Guides Galore

Over the years I have posted a few gift guides and I couldn't decide which was the best.  So, I decided to share all of them with you.  All the guidelines you could ever need for conquering the gift giving gauntlet! Click the links.  


Gift guide for teenagers: save yourself the heartache and give 'em some cash!!


I have given lots more of advice regarding gifts.  Let's get rid of all the noise for you, though.  The most important piece of advice I can give you (and I have said it many times before):

"Consider the individual recipient of the gift.
Imagine them using or enjoying your gift. 
Be thoughtful, practical and fun." 

That's that then. Everything you need to know to Win at gift giving! 

Friday, August 18, 2017

Jurassic World Party Part Two


Last week, I told you all about the decorations we had at the Jurassic World party.  This week I will show you the activities and tell you about the food we had at the party.  Check out my party Pinterest Board to see where I got a lot of inspiration, tips, tricks, instructions and printables. 

A quick note about the Birthday Boy: this was a tenth birthday party, so I spent a bit of time with the birthday boy before the party.  We talked about the movie, his favourite parts of the movie and activities he would like to do.   I also asked him what type of party he wanted, organised games where everyone does each activity at the same time or stations for each person to move to as they liked.  We ended up with a combination of the two.  

Activities


The activities were supposed to be spread out through the backyard.  We had to move a few activities at the last minute due to rain.  The kids didn't care.  Kids were checked in when they arrived, receiving a name badge and dinosaur temporary tattoo (This was their VID- Very Important Dinosaur- pass, like in the movie)

Pin the Horn on the Triceratops: my very talented Mum took a printed image of a triceratops, and used a grid overlay to draw a huge triceratops. She made some black horns and used yellow stickers to write a number on each.


Guess Jar: I filled an old coffee jar (that had been thoroughly cleaned) with some small plastic Dinosaur figurines. The BFF drew up a name and guess chart for guests to record their guess.  Hint: don’t forget to count the dinosaurs as you put them in the jar and write it down somewhere safe! Lol. About half way through the party I took the guess chart away and worked out which three guesses were closest to the exact amount and awarded prizes from a lucky dip box.  The Birthday Boy wanted to keep the jar of dinosaurs. 


Squad Training: we used some dinosaur figures (about 20-30 cm high) and lined them up along a shelf.  Guests had a six shooter Nerf gun (so six shots) to hit up to 5 dinosaurs.  The one who shot the most dinosaurs in the one turn got a prize from the lucky dip.


Footprint Match: I made up some cards using images from the internet and a print of labelled dinosaur footprints.  Only a few guests participated in this.

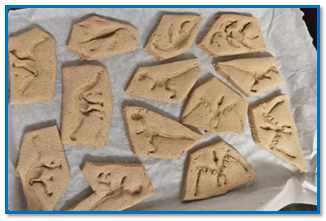
Fossil and Bone Digs: I made fossils using salt dough and some skeleton figurines (click here for instructions).  I also made some dino-sized teeth and a hybrid dinosaur skull for the kids to dig up.  My mum, (go Grandma) bought some sand from our local garden nursery for us to bury the fossils and “bones” before the party. I laid out small spades, spoons and paint brushes as tools.


DNA sequencing: I made a couple of big batches of yellow/ orange jelly and pushed some plastic bugs into the jelly.  The kids were supposed to use eye droppers to ‘suck the DNA out of the bugs’ and drop it in a test tube before putting it in the DNA sequencing machine (a box).  When they did this, they were given an ‘egg’ and went to the Hatchery.  Unfortunately, I didn't manage to get a photo of this.  Sorry. 
Hatchery: I made about 25 fizzing eggs (directions here) with dinosaur figurines in them.  The kids sprayed the eggs with vinegar and broke the eggs to hatch their very own dinosaur to take home.

Creation Centre: Dinosaur colouring, word searches, dinosaur cut outs and some coloured pens made this an easy centre! Check out my Pinterest board to get all the links I used to find these.  No picture of this either.  I was so busy that day! 

Photobooth: I threw together a bunch of props that we purchased from discount stores and the Big W party shop.  I also made a fire torch using cellophane and a large piece of brown cardboard.  The backdrop was created using a plastic table cloth, brown crepe paper, green crepe paper and leaves cut out of green paper.  A camp chair, a ladder, caution tape and an old pallet made it even better.  I created some "Warning: Dinosaur Area Keep Out" signs using a Google Image search.  

 I'm sure you're all very excited about the next part... THE FOOD! 

Food

For the Herbivores: carrot sticks, celery sticks, assorted fruit,
For the carnivores: party pies and sausage rolls (dipped in tomato sauce/ blood)
Dinosaur Cookies: I planned to make footprint cookies (check out the inspiration here), but I used my own cookie recipe which was a bit too soft for the footprint.  I added milo to my cookie mix to make it look like dirt, spread some Nutella on the top of each cookie and stuck dinosaur lollies (from the Natural Confectionery Company) on top.  They were really yummy!
Cake: was made by the Birthday Boy’s mum and dad. It was inspired by a few of the cakes on my party Pinterest board.   I pinned about 20 different cakes for my nephew to choose from.  As it was created by family, the cake wasn't as perfect as the ones that inspired it, but it was still cool.  Easy way out: check out these cake toppers!  (I'm not affiliated with the site linked).  

Jurassic Juice: a mix of pine-lime cordial, lemonade and water.  We poured this into jugs for serving.  Guests all got a cup with a Jurassic World Logo on it. 

I had lots more ideas for food, but as the party was mid-afternoon, we didn't go all out on a big range of food.  I pinned lots of ideas on the Pinterest Board, link above, so you can get inspired.  If you want to do something easy, you could order pizza:  Meatlovers for the carnivores, Vegetarian for the herbivores and Supreme or Hawaiian for the Omnivores.  You don't get much easier than that! 
That's that then. 
Enjoy the party planning!