Friday, June 24, 2016

Friday, June 17, 2016

The Felt Butterflies

I told you a few weeks ago that I was working on another felt project.  I finished it.  You should be so proud of me!  I think the "how to" is fairly self-explanatory, but I will give you a quick run down anyway. 

Materials:

  • Coloured Felt- at least one sheet of each colour (brown, purple, pink, green, white, red)
  • Scissors
  • Chalk pen (or any pen that will mark felt)
  • Optional (shape templates)

Steps:

  1. Lay out the materials and choose the colour you will use for the body of the butterfly.  I chose purple (because that is my niece's favourite colour) and I made a pink one as well. 
  2. Take the sheet of your chosen colour and fold it in half. 
  3. Use the chalk pen (or marker) to draw a large "3" on the felt, making sure the top and bottom points on the left side of the "3" are lined up on the folded edge.  Make the "3" as big as possible.  See the picture below.
  4. Keeping the felt folded (you might want to pin it so it stays folded), cut along the line you just drew.
  5. Open out the folded felt that is left.  You should have a shape that looks like butterfly wings.  Put outline scraps aside - you may want to save them for future projects or discard them later.
  6. Lay the butterfly wings down and then line up the brown felt so it covers one of the wings.
  7. Draw a long oval shape for the body of the butterfly.  See the picture below.
  8. Beside the oval, draw two antenna.  Thin rectangles will do the trick if you aren't sure how to make the shape.
  9. Cut around the oval (this will make the body of the butterfly) and the two antenna shapes. 
  10. Take a different coloured sheet of felt and fold it in half.  Draw different sized basic shapes onto the felt using the chalk pen.  I drew a large and a small square, various triangles, a wonky circle shape, a tear drop, diamonds and some squiggly lines. Make sure the biggest shapes you draw are still small enough to fit inside the butterfly wings that you cut out. 
  11. Keep the felt folded and cut out the shapes.  By having the felt folded, you will make two of each shape that you cut out and therefore the butterfly wings can appear symmetrical when decorated. 
    Cut felt while it's folded (doubled over) to get two of each shape.
  12. Repeat steps 9 and10 with another sheet of felt (in a different colour). 
  13. Lay the butterfly wings out and place the body and antenna on it.  Use the coloured shapes to decorate the butterfly so each side looks the same. You will have more shapes than necessary, however you can layer the shapes (big square on the bottom, little square on top) or use only a few of the shapes each time. 

  14. Fold the butterfly wings in half to fit the whole "puzzle" into a container or ziplock bag. Alternatively, you could put all the decorative shapes into a small bag and body shapes into another small bag, then place both bags into a container.
I hope those steps and photos helped.  It was a fairly easy task. You don't have to use the colours that I prescribed; I only used what I had in my craft supplies.  I made two butterflies so that both of my nieces could create their butterfly at the same time (no arguing!). 

This little puzzle can be an independent activity for children 3 years and older.  You could make it a little more challenging by doing one of the following. 
  • You decorate one wing of the butterfly and ask your child to decorate the other wing with the same design. 
  • Give your child a smaller selection of shapes (only triangles or only squares or big squares and little triangles) and let them decorate.  \
  • Ask your child to sort the shapes by colour or shape before putting them away. 
  • Use the shapes to make some basic line patterns (e.g. square, triangle, circle, square, triangle, circle, OR blue, red, blue, red, blue, red).  
  • Ask your child to identify each shape or colour as they put it on the butterfly. 

If you are looking for more inspiration to keep the kids busy with felt projects check out Living Life and Learning.  Don't forget that there are heaps of activities you can try with the little ones in your life on my Pinterest board: Nephews and Nieces, Bits and Pieces

This is the world's most Awesome Aunty, Signing Off.


Friday, June 10, 2016

Card Craft: Inspiration and Improvement


I promised some cards that I have made and I promised to share some of the wonderful places that I found inspiration.  There are some clever people out there on the interwebs - including me!  

Source
Thank you card May 2016
Source

Birthday Card for my cousin - May 2016


Source
Birthday Card for the BFF - December 2015

Birthday Card for my Nephew - January 2016

Source


That's that then!


Friday, June 3, 2016

I've been Crafting Cards

Last year I decided that I must use all the craft supplies I had in my various containers before purchasing anymore.  While I haven't quite stuck to this resolution, my purchases have mostly had the purpose of helping me create, using the items I already have but in a better way. 
I had a lot of paper.  Patterns, coloured card, plain card, textured card, card templates! I had craft cutters, various glues and glitters and paints and ink pads and one or two stamps, buttons, stickers and fancy pens for writing fancy messages in home made cards.  I also have ribbon - lots of ribbon.  I have made quite a few cards in the past couple of years.  Birthday cards, Mothers' Day cards, Thank you Cards.  I have plans for making more cards- and thus using up my supplies. 


I have purchased a few more craft cutters, a few more card templates and just one stack (ok, 2 stacks)of new coloured/ patterned paper.  I invested in a rotary cutting tool with ruler and fitting so that I can cut straight lines in my cardboard and paper.  I bought some glue dots because they work better than some of the glues that I was using. 

This new creative outlet has been more than a simple exercise in using what I have.  Lately, it has been a way for me to escape the reality of life.  For a short time, I am able to have complete control over something.  I am able to relax and make something fun or pretty or cute.  I start with bits and bobs and make something that makes me smile.  I also have something to give away.  I have tokens of gratitude, birthday wishes or encouraging messages.  I make something.  Me! It is kind of good. If I do say so myself.  See!

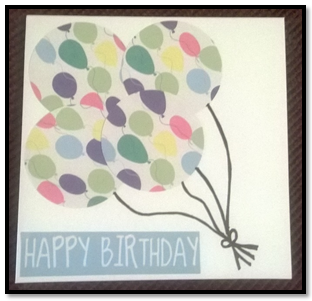
The best thing for me is being able to look at photos of cards I made when I first got started in this card making lark.  I can see improvement.  It still takes me forever to design the cards - mostly deciding which colours go well together or which patterns don't clash too much.  I still get a little nervous and touchy about placing things properly once the glue is on.  But, I do love looking at the finished product.
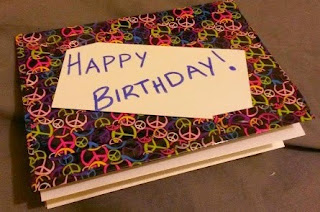
Birthday Card for my Nephew March 2015
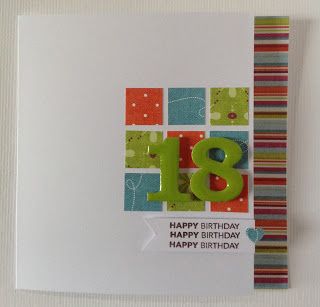
Birthday Card for my Bro in Law- September 2015


Next time I will show you some of my recent cards alongside the cards that inspired them. 
First, I have to show you the card I made for my nephew - he turns 9 this week!