Friday, July 26, 2019

Almost time to Party... Harry Potter's Birthday!

31 July is Harry's Potter's Birthday! So, to get you in the groove for some Wizarding Fun, let's check out some of my favourite ways to celebrate everyone's favourite magical orphan.

1. Face paint... Last year, I spent Harry Potter's Birthday, with a black lightening shaped scar 'painted' on my forehead.  Can you believe my colleagues felt no need to join me?


 2. Make sure your friends know it's time to party.


 3. Get your invisibility cloak on and....


4. Play some Hogwarts Inspired Games....


Check out these links for more ideas of Harry Potter Games to play.  

5. Be Proud of your Harry Potter Obsession


6. Decorate..

Click here for more ideas for decorating an Epic Harry Potter Party. 

7. Have some sympathy for Voldemort.... 


7. Remember.... 


AND.....

BUT... some life choices need to go a bit further than.... 


What are you doing on Harry Potter's Birthday? Let me know in the comments.  


Friday, July 19, 2019

Just for Fun

I decided to use a writing prompt today.  I used to write from these all the time!  It's been a long while since I have, maybe because I often don't need that extra boost.  I usually have plenty to say, plenty to write about.  Anyway, let's do this.


The colours of the week....

Monday - navy blue and white blouse, with navy blue pants.
Tuesday - blue patterned top with navy blue shorts.  My striped navy blue cardigan looks good.
Wednesday - Grey tracksuit pants with a black T-shirt and pink hoodie.  My pink hoodie is really uncomfortable.
Thursday - black blouse that has pretty orange and pink florals on it, black pants with my hot pink cardigan.  I realised that I needed something more cheerful.
Friday - blue denim 3/4 pants with my rainbow T-shirt (with the word Supercalifragilisticexpialidocious).  Every letter is a different colour.  I love this T-shirt so much that I bought two of them.
Saturday - dark blue jeans and blue top with pretty white flowers.  Apparently, I like flowers on my tops.
Sunday - Red blouse (it's a uniform) with a black skirt.

I have a lot of dark colours in my wardrobe, so it seems like a dark week.  It wasn't a dark week at all.  It was a lovely week.  I just happen to look great in navy blue.

Are you totally bored.
Sorry, not sorry!

Friday, July 12, 2019

More Cards with Basic Shapes

Last week, I shared some cards that were made using basic shapes and basic supplies.  This week, I want to share some more cards that use 'geometric' shape dies/ punches and geometric stamps.  The stamps are usually circle or round shapes, but you could do very similar cards using triangles, squares, stars or even heart shapes. Firstly, let's check out some cards using mostly die cuts.


Hexagons

I love these cards with a soccer theme. One size of hexagon die or punch with some black and white cardstock is the basis for this card.  You can dress it up with green, for the grass field then add a sentiment by stamping on a banner or using a die cut.


Hexagons can also be used to congratulate the Parents to Be.... inspired by this card.

Do you get it? It's honeycomb, like Bees would have.  I love punny cards!  
The hardest thing about this card, was deciding which hexagons to put where.  
I just used some pattern papers in yellow, black, white and gold.  

TRIANGLES... are great!


While I made this card using dies and an embossing folder, you could make a similar card with just a pair of scissors and some card stock.  One triangle die, cut twice, and a circle die, makes a cute bow tie.  This card was easy to mass produce too. :)
You can also arrange your triangles in a simple pattern to make a fun geometric background like in this card.


Triangles can make beautiful Christmas trees, like in the cards I made last year or this one.  

Click here for a tutorial on how I made a big batch of cards just like this one. 

Squares

A small square punch used 4 times, makes the cutest little 'paper present' to stick to the front of a birthday card.  I prefer to use plain coloured cardstock to make this type of card, but you can use patterned paper too. I used a large square punch and stick the smaller squares onto, this helped me to get them lined up more easily.  I just tied a bow using some twine and stuck it to the top using a mini glue dot. You could use this for Christmas as well as birthday cards.  Bonus!


You might like to check out this stunning card using different sized squares, too.  

Character Cards


I love using basic shapes to create characters or animals for my cards.... Aren't these (Pinterest inspired ) Minion cards just adorable?  These cards were so easy to make and most paper crafters would have all the supplies in their stash.  Some black, grey and yellow card stock, goggle eyes, circle punches, scissors and glue is all you need.  A paper trimmer and bone folder would help, but it isn't necessary.  I printed the sentiment using my computer, but on one of these cards, I simply wrote it on the inside by hand. I have even made these cards with kids and they loved it.


For more animal and character card inspiration with basic cardstock shapes, click here or check out  this Pinterest board.

Now for the basic shape STAMPS!! I love these and you could probably use similar stamps to make some of the card ideas I have shown you using die cuts.  Let's get into this.

Did you know I have an obsession with circles?!


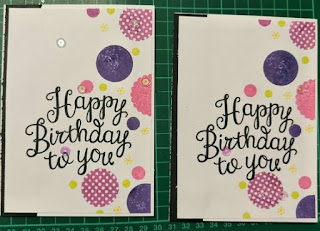
Circle stamps can be used to make great backgrounds.  Remember that different sizes, colours and patterns add interest to your card.  A simple sentiment is all you need to finish it up. I have three stamp sets that include circle shapes in them and I use them often!  Check out these confetti type  rainbow birthday cards using Ring in the Celebration from Winnie and Walter which were inspired by a  Catherine Pooler KISS card.


Circle stamps can be used to make baubles like they are hanging from a Christmas Tree or the ceiling like in this card I made.  Click on the caption of the image below to see Lisa Harolle's original card that inspired me.
This card was inspired by Lisa Harrole

Rock what you got!

The great thing about using basic shapes, is that the possibilities are endless!  Basic shapes are a great "staple" for your craft stash and with a little bit of imagination, you can really stretch your geometric stamps, dies (and even) stencils to make some fun and beautiful cards.

I haven't linked to specific supplies because the purpose of this post is to encourage you to use what you already have.  If you are looking to purchase some basic shapes, there are lots available. Most stamp/die companies will stock basic shaped stamps and dies.

I would love to see what you have created using basic shapes or any other ideas you have seen using those everyday shapes.  Let me know which shape you use on your cards the most, in the comments below!

See you next week!
Happy Crafting

Friday, July 5, 2019

Card Making with Basic Shapes

This week I'm going to share some OLD cards.  I made many of these cards when I first started card making.  They were created with minimal supplies and some creative use of basic shapes.  There are a few cards here that I have made recently and still with some very basic shapes.


 Most of these cards were created using basic shape dies or punches, a paper trimmer and a pair of scissors. The stamps I used on these cards were mostly sentiment or alphabet sets.


Are you ready to see some fun and easy cards made from basic shapes?  Let's do this...

Animal Cards


I made these animal cards using circle punches and a little bit of imagination. There is one card using buttons instead of circle punches, but if you don't have any buttons, coloured paper circles would work just fine.

Rounded rectangle dies made a great backdrop for the sentiment,which I made using an alphabet stamp set.  
Two different sized circle punches were used to make the head and body of the bunny. I used the smaller circle punch to make ears, by cutting a circle of pink card stock, then cutting it in half and shaping it into ears with my scissors.  I gave this card to my niece, who LOVES Peter Rabbit. 

Pink and brown buttons made very cute little pigs on this card.  I used some water based felt tip pens to draw ears, legs and tails around the buttons and some goggle eyes to add to the bigger buttons.  I had a grunge stamp set which I used to make splats of 'mud' around the pigs.  You could use a paint brush and flick big splotches of brown ink on your card instead.  The tag was from a kit I bought at a bargain centre with a simple Happy Birthday sentiment stamped on it.  This card was for my pig-loving nephew.  

This was one of the first cards I made.  I used three different sized circle punches to make this cat that is peeking out from behind the wall of patterned paper.  I used a cat stamp to stamp on the face.  The ears were cut with scissors out of black cardstock.  I used a hexagon nested die set to make the framed sentiment.  I had to add the adorable paw prints too.  

This Very Hungry Caterpillar was created using circles of green and yellow card stock, and one red circle.  The eyes, feelers, nose, mouth and legs were cut using scissors.  This one was so much fun.  A sentiment die, a number 1 stamp and an alphabet stamp set worked together to make the sentiment. 

Cars!


I made this first card a few years ago for one of my nephews.  He loves VW combi vans.  I used circle punches, a rounded rectangle die and some circle shaped paper I bought at a bargain centre.   I also used some circle and letter stickers.  The only stamping is a simple Happy Birthday sentiment. It is clearly one of my earliest cards and not my best ever, but I'm still very proud of it.  I did it with the most basic supplies and my nephew loved it... all that really matters.


I made this next card about a month ago.  There are some number dies used here and a stamp set from Catherine Pooler.  The supplies were not so basic to get the overall look.  However, I wanted to draw your attention to the logo.  This was a joint effort with my Mum.  I cut out the circle frame using two circle dies.  My mum drew the inside shape with pencil on the back and cut it out with a craft knife.  I glued them together to make this logo.  It is supposed to be a Mercedes logo.  It's not perfect, but it's close enough and my cousin (who loves Mercedes cars) thought this card was awesome.  Mission Accomplished.


Baby Cards


Both of these cards are so cute.  I made them using circle punches, a trimmer and a pair of scissors.  So easy and very effective.  I just realised that both of these cards are for boys.  However, you could easily make them for girls by changing up the colour.  You could also make these cards using more gender neutral colours such as a mint green or purple.


Celebration cards


Here, I have used circle punches to make balloons.  You can add texture to the balloons using embossing folders or even heat embossing if you have those supples.  However, simply using patterned paper or plain coloured cardstock can be very effective too. Both of these cards happen to be for big birthdays, but I have used this sort of design for several other celebrations including new babies, graduation and retirement.  This is a good design to fall back on when you want to make something cute, but you don't know what to make.  It uses very basic supplies too.


This is only the beginning.  Come back next week, for more cards created using basic shapes, including some basic shape stamps.

Happy Crafting!